Electron 入门实例
在上一章节我们已经学会了如何安装 Electron。
本章节我们将一步步介绍如何创建一个简单的 Electron 实例。
1、创建项目目录
打开终端,依次执行:
mkdir my-electron-app
cd my-electron-app
npm init -y
npm install electron --save-dev
生成结构如下:
my-electron-demo/
├─ package.json
├─ main.js
└─ index.html
2、配置 package.json
打开 package.json,修改成以下内容:
{
  "name": "my-electron-app",
  "version": "1.0.0",
  "description": "RUNOOB Electron 测试",
  "main": "main.js",
  "scripts": {
    "start": "electron ."
  },
  "devDependencies": {
    "electron": "latest"
  }
}
说明:
| 字段 | 作用 |
|---|---|
"main" |
指定 Electron 启动时要执行的主进程文件 |
"scripts.start" |
定义 npm start 命令的执行内容 |
"electron ." |
表示让 Electron 运行当前目录下的应用 |
"devDependencies" |
开发依赖,不会被打包进最终应用 |
3、编写主进程文件 main.js
这是 Electron 的核心控制中心,负责创建应用窗口和加载页面。
创建文件 main.js,输入以下完整代码(带详细注释):
实例
// main.js —— Electron 主进程文件
// 从 electron 模块中导入 app(控制应用生命周期) 和 BrowserWindow(创建窗口)
const { app, BrowserWindow } = require('electron');
// Node.js 内置模块,用于拼接文件路径
const path = require('path');
// 创建一个函数,用于生成主窗口
function createWindow() {
// 创建一个新窗口实例
const win = new BrowserWindow({
width: 800, // 窗口宽度(像素)
height: 600, // 窗口高度(像素)
resizable: true, // 是否允许用户拖动调整窗口大小(默认 true)
title: "RUNOOB Electron 测试", // 窗口标题,会显示在标题栏
webPreferences: {
// 网页运行相关配置
contextIsolation: true, // 启用上下文隔离(安全推荐)
nodeIntegration: false, // 禁止直接在网页中使用 Node.js
}
});
// 加载本地的 index.html 文件到窗口中
// path.join(__dirname, 'index.html') 会返回当前目录下的 index.html 路径
win.loadFile(path.join(__dirname, 'index.html'));
// 打开开发者工具(可选,方便调试)
// win.webContents.openDevTools();
}
// 当 Electron 初始化完成后,会触发 app 的 ready 事件
// app.whenReady() 返回一个 Promise,执行完后调用 createWindow()
app.whenReady().then(createWindow);
// 当所有窗口关闭时触发(仅在 macOS 外生效)
app.on('window-all-closed', () => {
// process.platform 返回操作系统平台
// macOS 的平台值是 'darwin',在 macOS 上一般保留程序常驻
if (process.platform !== 'darwin') {
app.quit(); // 退出应用
}
});
// macOS 特殊逻辑:点击 Dock 图标时重新创建窗口
app.on('activate', () => {
// 如果当前没有打开任何窗口,就重新创建一个
if (BrowserWindow.getAllWindows().length === 0) {
createWindow();
}
});
说明:
| 概念 | 说明 |
|---|---|
| 主进程(main process) | Electron 启动后首先运行的脚本,负责窗口创建、菜单控制、系统 API 等。 |
| BrowserWindow | 用于创建一个浏览器窗口,里面加载网页内容(HTML 文件或 URL)。 |
| app.whenReady() | 确保 Electron 初始化完成后才创建窗口,否则可能报错。 |
| win.loadFile() | 加载本地 HTML 文件。也可以用 win.loadURL('https://example.com') 加载网站。 |
| contextIsolation | 将网页脚本和 Node 环境隔离,提高安全性(官方推荐)。 |
| nodeIntegration | 若设为 true,可在页面中直接用 Node.js(但有安全风险)。 |
| window-all-closed | 在所有窗口都关闭时退出应用(Windows/Linux 生效)。 |
4、编写渲染页面 index.html
创建 index.html 文件,输入以下内容:
实例
<!DOCTYPE html>
<html>
<head>
<meta charset="utf-8">
<title>菜鸟教程(runoob.com)</title>
<style>
body {
margin: 0;
display: flex;
align-items: center;
justify-content: center;
height: 100vh;
font-family: "Segoe UI", Arial, sans-serif;
background: #f5f7fa;
}
.box {
text-align: center;
background: white;
padding: 40px 60px;
border-radius: 12px;
box-shadow: 0 6px 20px rgba(0, 0, 0, 0.08);
}
h1 {
margin: 0 0 10px;
color: #333;
}
p {
margin: 0;
color: #666;
}
</style>
</head>
<body>
<div class="box">
<h1>Hello, Electron!</h1>
<p>RUNOOB Electron 测试。这是你创建的第一个 Electron 桌面应用 🎉</p>
</div>
</body>
</html>
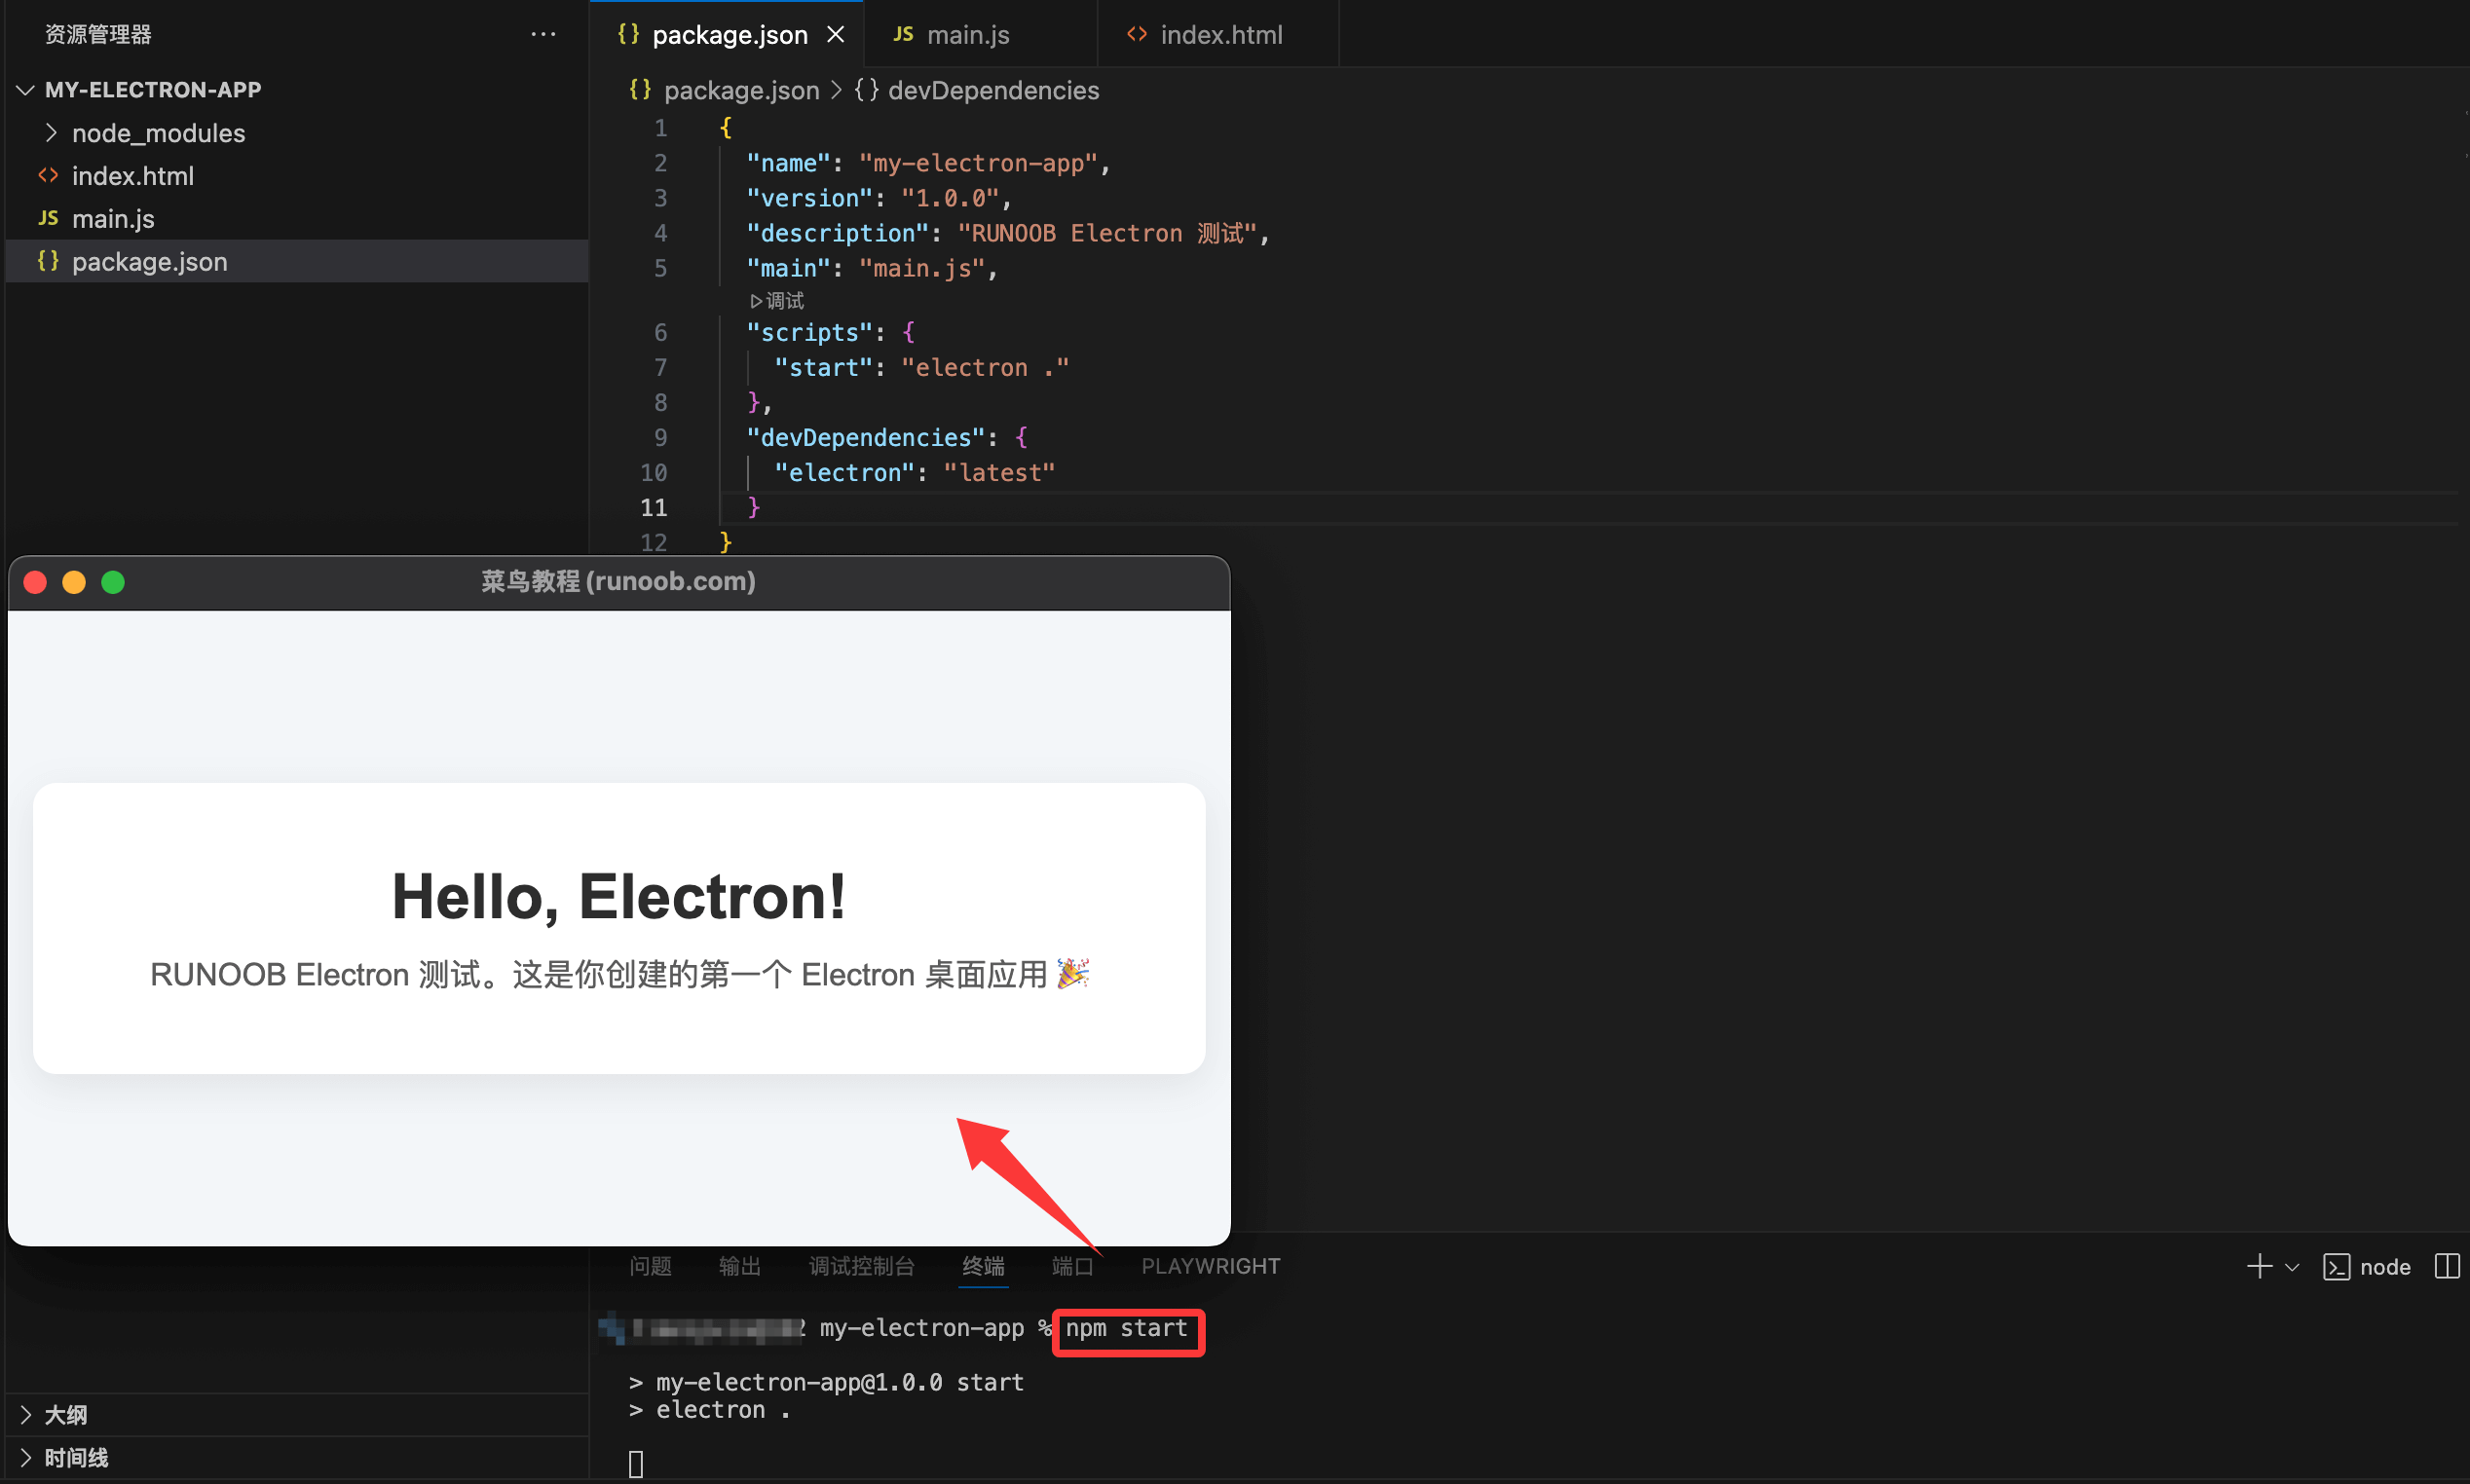
5、运行项目
回到终端,执行:
npm start
运行后,你会看到一个桌面窗口,显示:
Hello, Electron!
RUNOOB Electron 测试。这是你创建的第一个 Electron 桌面应用 🎉

点我分享笔记